Creating Apps from CSV Files
You can create a new app by importing a CSV file. This lets you also import file data into the app at the same time.
To import data from an Excel file, refer to Creating apps from Excel files.
To import data from a CSV file into an existing app, refer to Importing record data from a file into an app.
Overview of the steps to create an app from a CSV file
(1) Prepare a CSV file for import.
(2) Format the data in the CSV file so that the data can be imported into kintone, then save the file.
(3) Follow the instructions on the wizard to import the file.
Details of the steps to create an app from a CSV file
-
Format the data in the CSV file so that the data can be imported into kintone. Then, save the file on your PC.
Reference: Points to consider when formatting data in a CSV file -
On the kintone portal, click the Create app icon (the plus sign-shaped icon) in the Apps section.
-
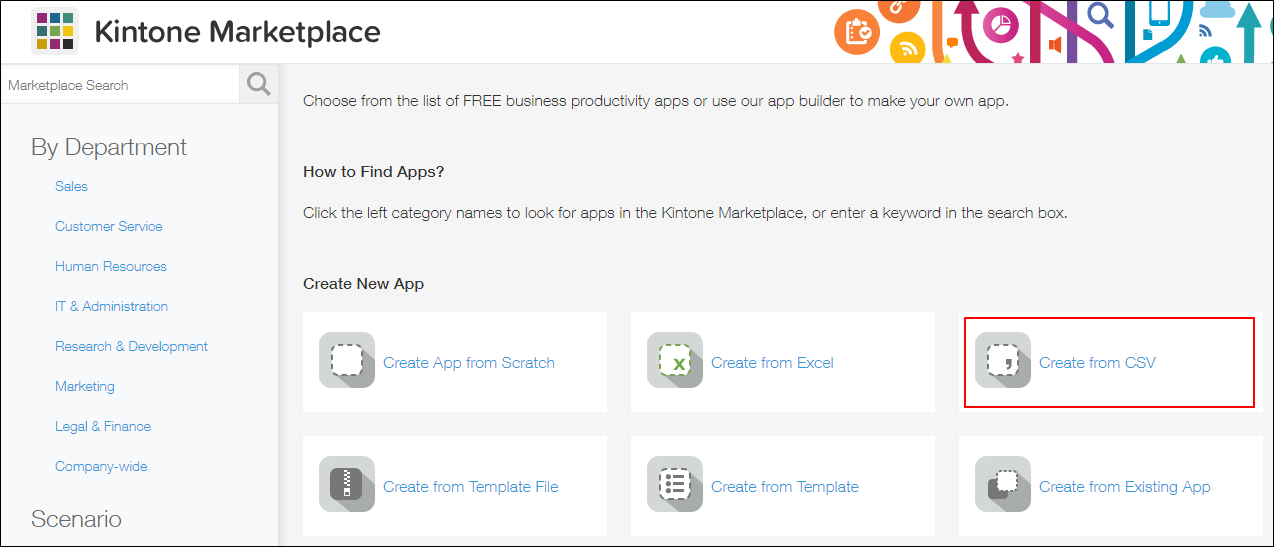
On the kintone marketplace screen, click Create from CSV under Create new app.
-
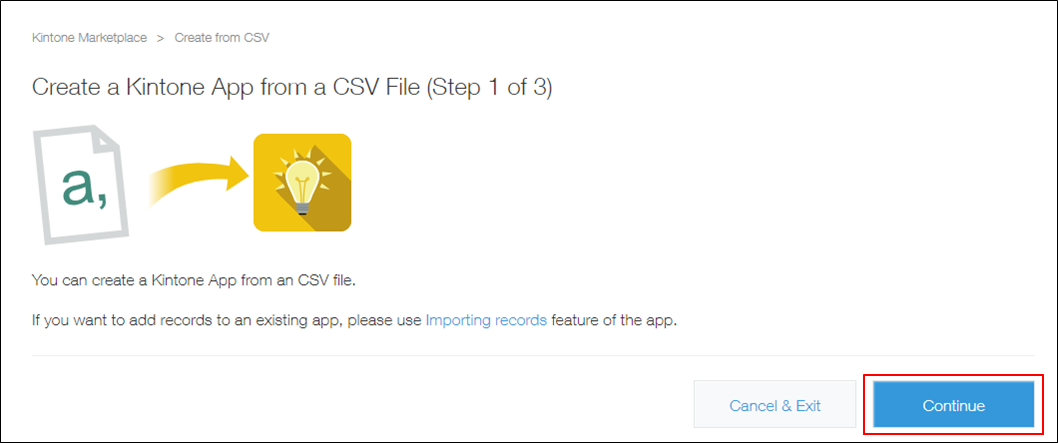
On the Create from CSV screen, click Continue.
-
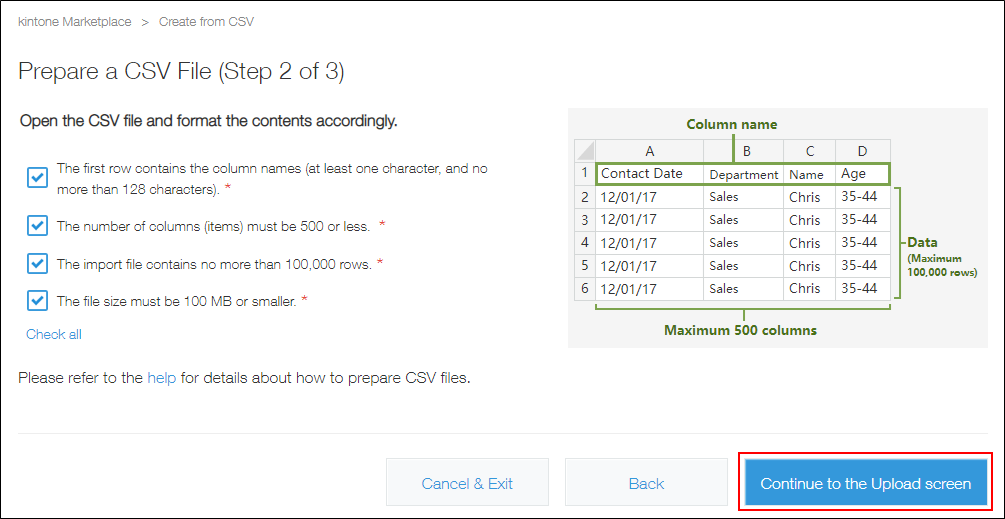
Confirm and select the checkbox for each file formatting requirement, then click Continue to the Upload screen.
-
Click Browse under Upload a CSV file, then select a file to import.

-
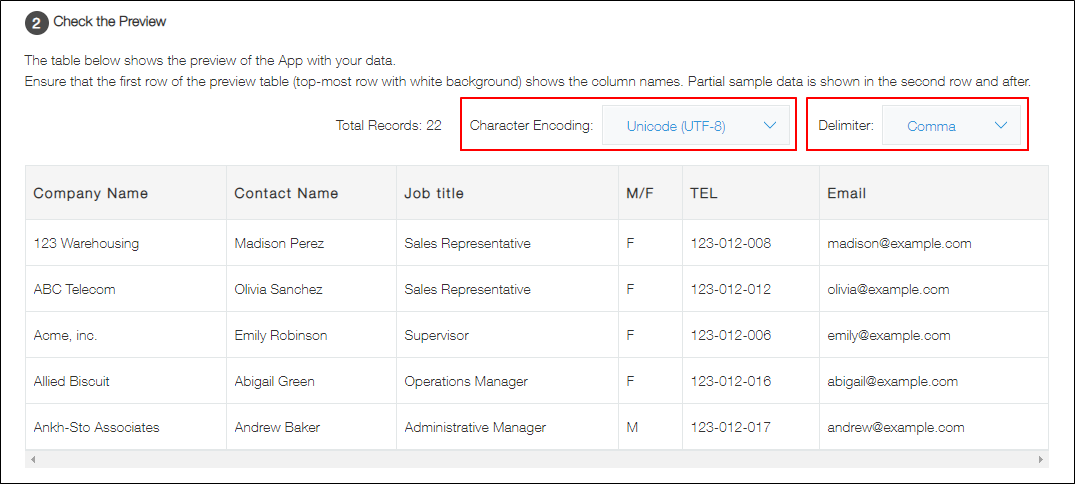
Under Check the preview, make sure that the content of the file you are importing is displayed correctly.
If characters in the file are garbled, select a different option from the Character encoding drop-down list.
If the file is not separated into columns correctly, select a different option from the Delimiter drop-down list.
-
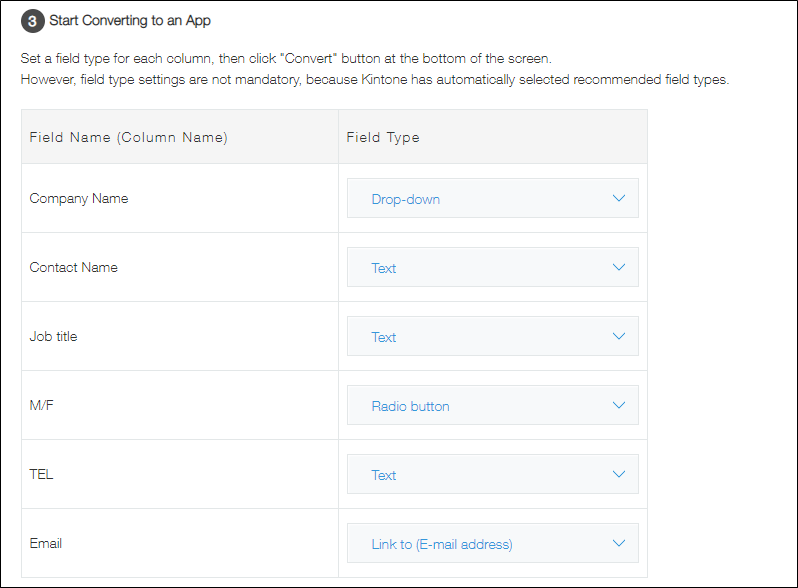
Under Start converting to an app, check that the automatically selected field types are correct.
Appropriate field types are automatically selected for each item based on the data in the CSV file. Generally, you do not have to change the field types.
For any items that you do not want to import into the app, select (Skip this row).
-
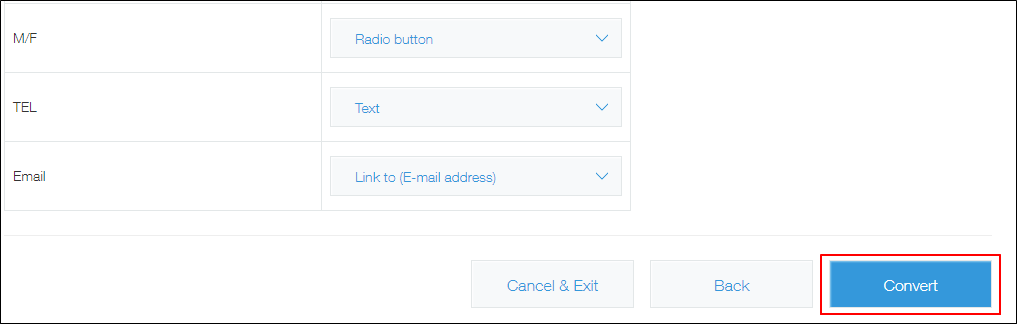
Click Convert on the bottom right side of the screen.
-
Click OK on the confirmation dialog.
-
When the import completes, check the created app.
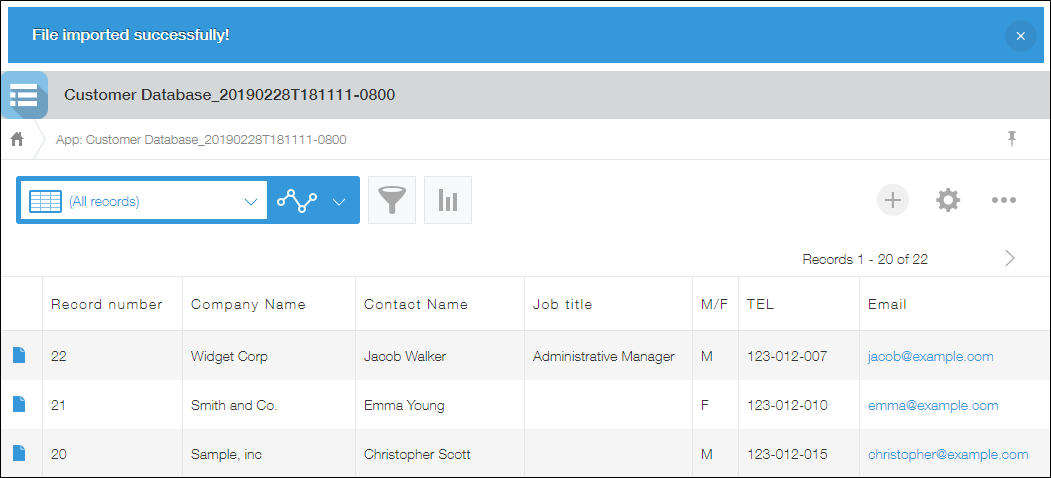 You can change the app's name, icon, field positions, and other settings as you see fit.
If the app creation fails, refer to the following page.
If creating an app from an Excel or CSV file fails
Points to consider when formatting data in a CSV file
- An app can be created from a file that is not more than 100 MB in file size and has not more than 500 columns nor 100,000 rows.
In kintone, you can create an app with up to 500 fields (500 columns).
If the file size exceeds 100 MB or if the file contains more than 100,000 rows, consider splitting the file into several files. After using one file to create an app, you can import the remaining data in additional files using the Import from File feature.
Importing record data from a file into an app - If the file contains any characters other than Japanese or alphanumeric characters, specify "UTF-8" for the character encoding and then save the file.
When importing numeric values
The following symbols cannot be used.
- "," (thousands separator)
- "" (Yen sign) and other currency symbols
When importing date and time data
In a CSV file, specify year, month, day, and time in any of the following formats:
- YYYY-MM-DD (Example: 2014-12-20)
- YYYY/MM/DD (Example: 2014/12/20)
- YY/MM/DD (Example: 14/12/20)
- MM/DD/YYYY (Example: 12/20/2014)
- MM/DD/YY (Example: 12/20/14)
- DD/MM/YYYY (Example: 20/12/2014)
- DD/MM/YY (Example: 20/12/14)
- HH:MM AM/PM (Example: 11:20 PM)
- HH:MM (Example: 23:20)
Single-digit months, days, and time can be entered in either the single- or double-digit format.
For example, you can enter either "8" or "08" to indicate 8.
Example of CSV file data
Field name
2023/8/8 11:02 PM
2023/08/08 23:02 PM
2023/8/8 23:2
When importing names, department names, or group names
The data can be imported into any of the following field types.
- Text fields
- Fields with options (Radio button or Drop-down field)
- User selection fields (Fields for selecting one or more kintone users)
- Department selection fields (Fields for selecting one or more departments)
- Group selection fields (Fields for selecting one or more groups)
When importing values into a "User selection," "Department selection," or "Group selection" field
Enter one of the following character strings:
- For a User selection field: Login name
- For a Department selection field: Department code
- For a Group selection field: Group code
If you want multiple users, departments, or groups to be selected in a field, separate the values using line breaks.
Example of CSV file data
Name
"noboru_sato
misaki_kato
takuya_suzuki"