Configuring Permissions for Records
Configuring the Permissions for records settings lets you control which users can view, edit, and delete specific records.
Steps
-
Click the App settings icon (the gear-shaped icon) at the upper right of the View screen.

-
On the App settings screen, select the App settings tab, then click Records under Permissions.
-
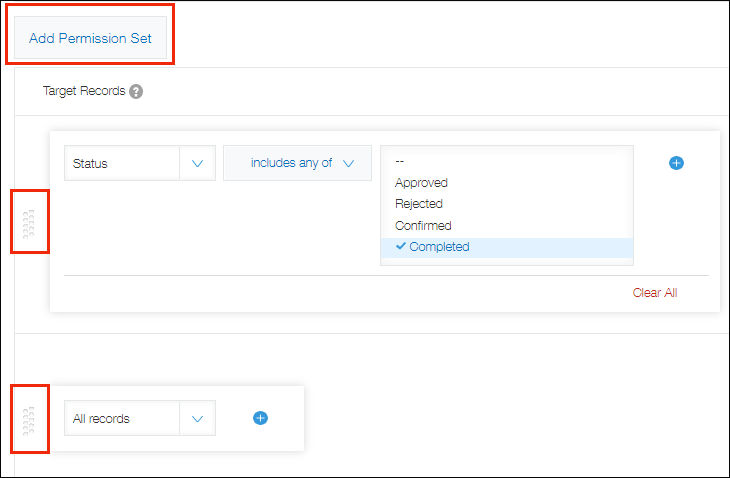
On the Permissions for fields screen, click Add permission set.
-
In the Target records section, specify the condition for the permission setting to be applied to records.
To combine multiple conditions, click the Add a condition icon (the plus sign-shaped icon). Then, specify an additional condition and select either All conditions are met or Any conditions are met.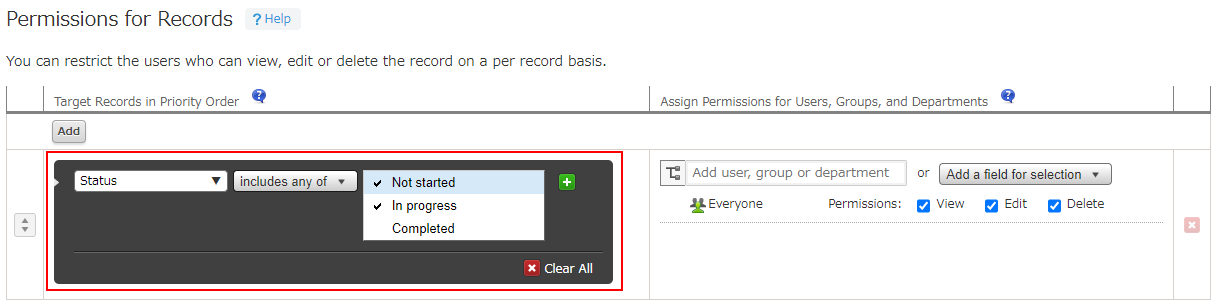
-
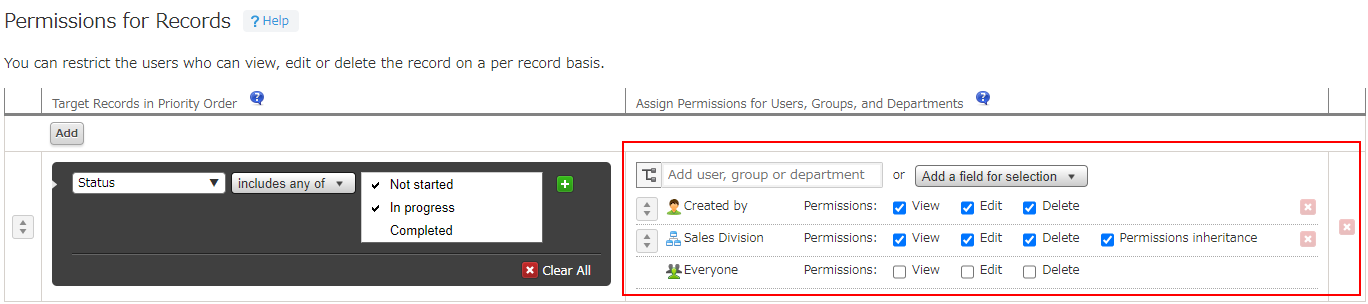
In the User, group and department to grant permissions to section, add the users, groups, or departments for whom you want to set permissions.
You can add users, groups, or departments by using the search box, or by clicking the Select users from departments or groups icon to the right of the search box and making a selection from the Select users dialog.
-
If you want to grant permissions to the users, departments, or groups entered in a certain field, click Add a field for selection and select a field.
The following fields can be selected.- User selection
- Department selection
- Group selection
- Created by
- Updated by
If the Process Management feature is enabled, Assignee can also be selected.
-
Select the checkboxes for the permissions that you want to grant to the users, departments, or groups.
-
To set multiple combinations of target records and permissions, click Add permission set again and add more conditions.
When there are multiple rows of permission sets, higher rows take precedence over lower rows. To change the priority order of a row, drag and drop the row using the Reorder icon at its left.
-
Click Save at the bottom right of the screen.
-
On the App settings screen, click Update app.
-
On the Update app dialog, click Update app.
Fields that cannot be specified in the "Target records" section
The following fields cannot be specified in the Target records section.
- Label
- Rich text
- Text area
- Attachment
- Related records
- Blank space
- Border
If you want to grant access permissions using a department or group
If you set permissions using a department or group and the settings of the department or group are changed, the changes may not be reflected in the permission settings.
To have the latest department and group information reflected in all record permission settings, update the app settings.
Note that record permission settings are reflected when the following operations are performed.
- When the app settings are updated
- When a record is added
- When a record is updated
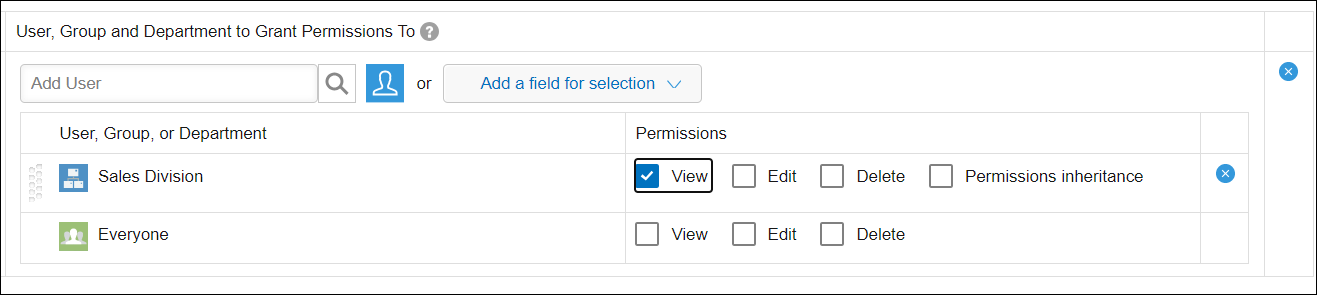
If you include a single user in multiple permission sets
If a single user is included in multiple permission sets in the Permissions for records settings, the permission set located highest on the list will take precedence.
For example, suppose the "Sales Division" department is listed above "Everyone". If the "Sales Division" department has the "View" permission but "Everyone" does not, only users who belong to the "Sales Division" department will be able to view the relevant records.
Example of how to use record permissions
This section provides usage examples of the Permissions for records settings.
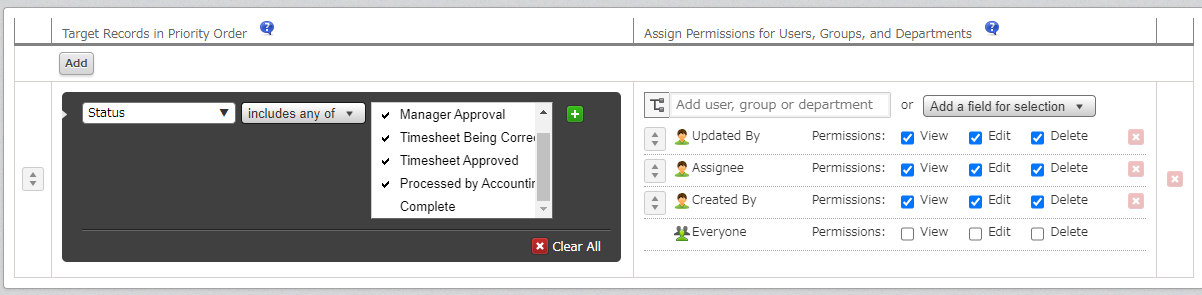
Specifying "Created by", "Updated by", or "Assignee"
You can set permissions for the user who created the record, the user who updated the record, or process management assignees.
For example, in an app for which the Process Management feature is enabled, you can configure the settings in such a way that only the Created by, Assignee, and Updated by users can view records with a status that is not set to "Completed".
Specifying the "User selection" or "Department selection" field
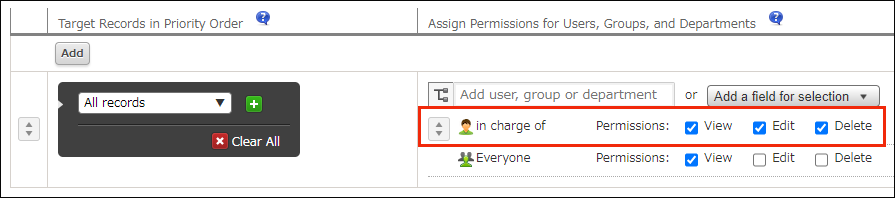
By specifying a User selection or Department selection field placed on the app form, you can apply permission settings to the user or department selected for the field in each record rather than to any one specific user or department.
For example, you can configure the settings in such a way that only the user specified in a specific User selection field (the "in charge of" field) can edit or delete the record.