Examples of how to autofill approvers
By autofilling a process management assignee (e.g., for an approver role), you can simplify the process for adding records and also prevent input errors.
This article shows two autofilling examples.
Example 1: Setting a reporting manager as an assignee
In this example, you will assign a user's reporting manager in a custom field of the user's profile so that the reporting manager will be automatically made the next process management assignee after the user takes an action.
Image of the created app:

To set a reporting manager as an assignee, follow the steps below.
Add a custom field for a reporting manager
To carry out the steps described below, you need to have permission to access the Users & system administration screen.
-
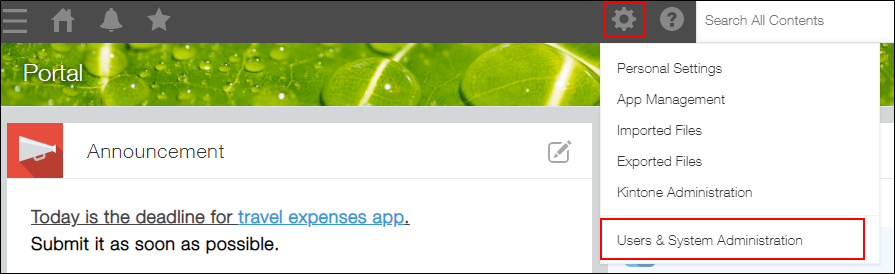
Click the Settings icon (the gear-shaped icon) at the top of kintone, then click Users & system administration.
-
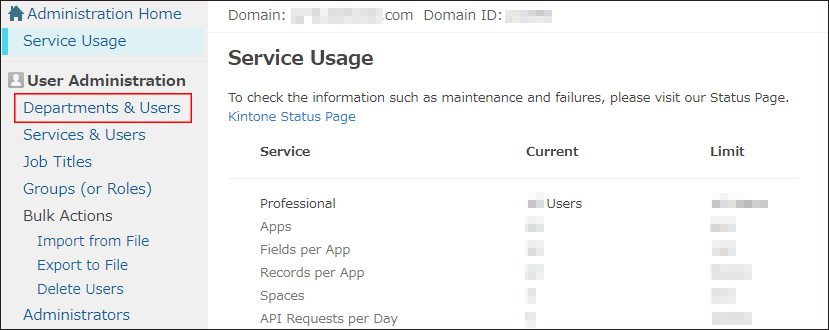
Click Departments & users on the Users & system administration screen.
-
On the Departments & users screen, click Profile settings.
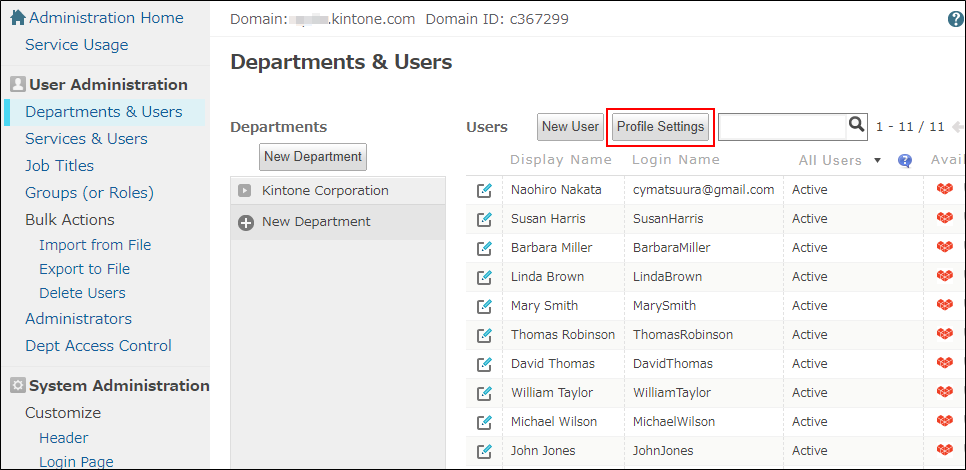
-
On the Profile settings screen, click Add in the Custom fields section.
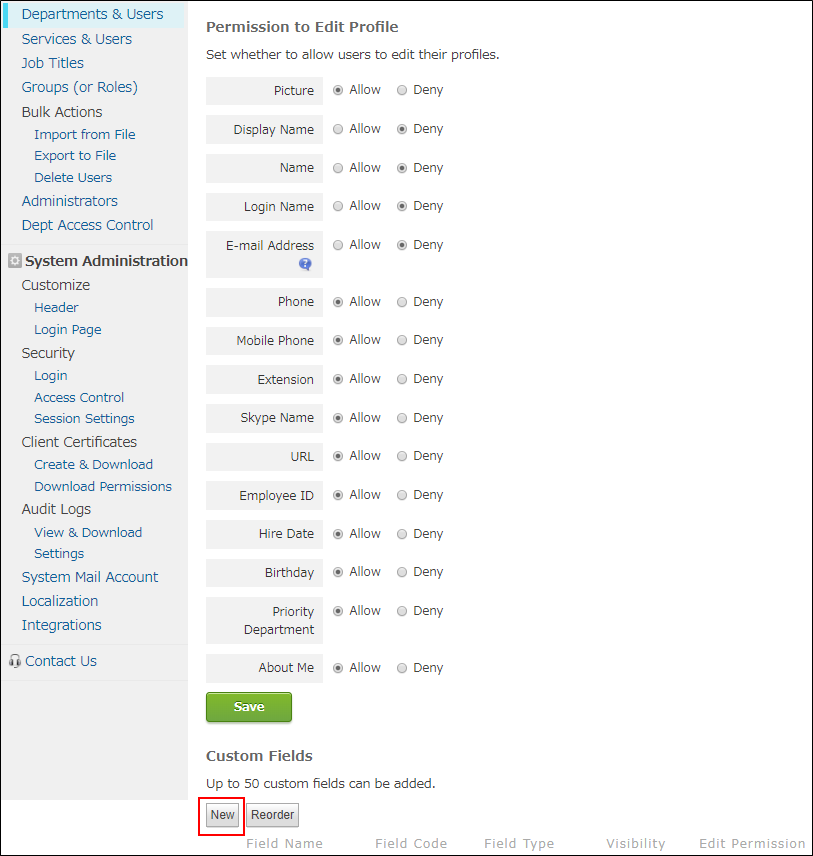
-
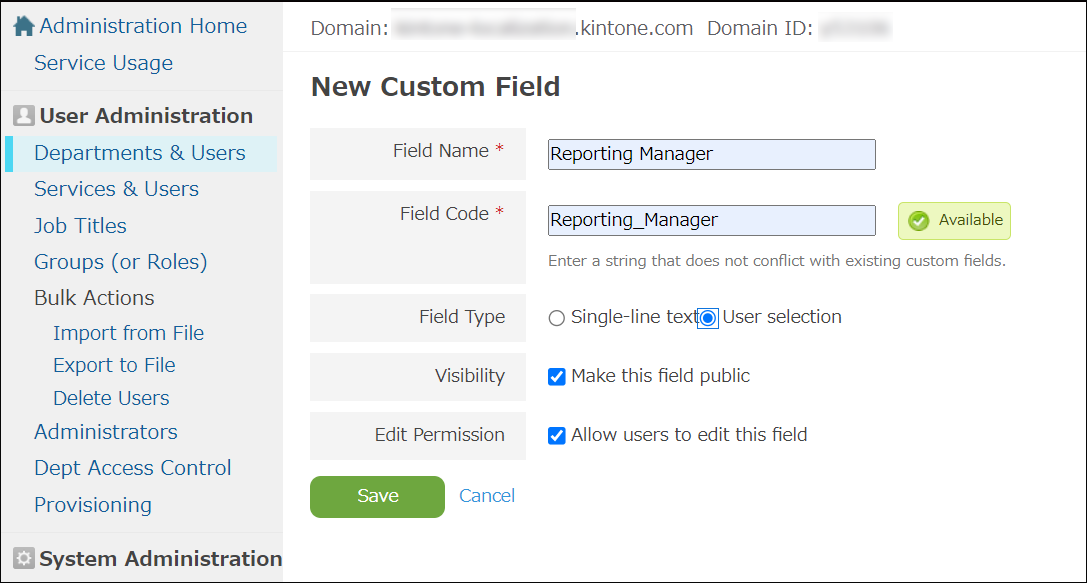
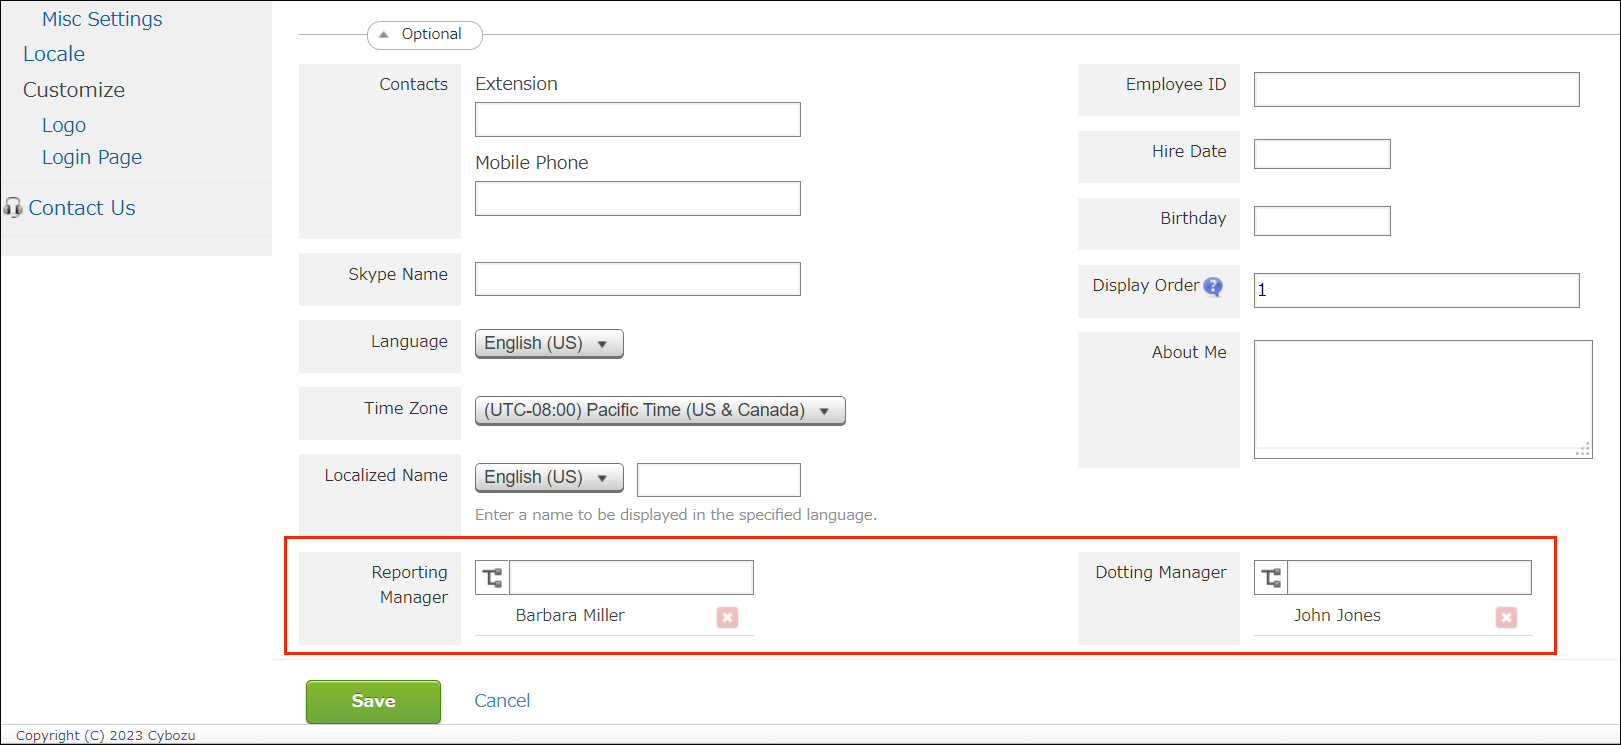
On the Add custom field screen, enter a field name.
In this example, name the field "Reporting Manager". Select User selection for the field type.
-
Click Save.
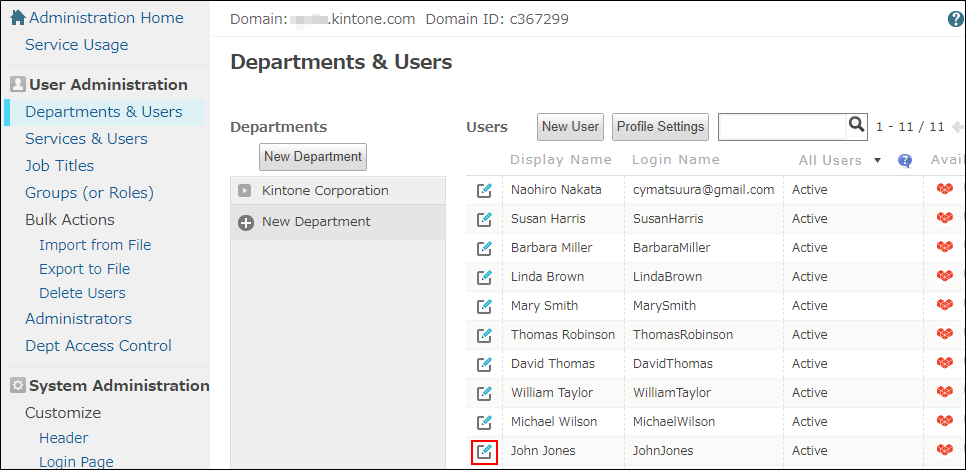
-
On the Departments & users screen, click the icon to the left of the user whose manager you want to set.
-
On the Change user information screen, specify a user in the custom field "Reporting Manager" at the bottom of the page.
The custom field can contain only one user. To allow multiple reporting managers, you need to add a custom field for each reporting manager.
-
Click Change user information.
Add a reporting manager as an assignee
-
Open the kintone app where you want to add a reporting manager as an assignee, and then open the Process management screen.
-
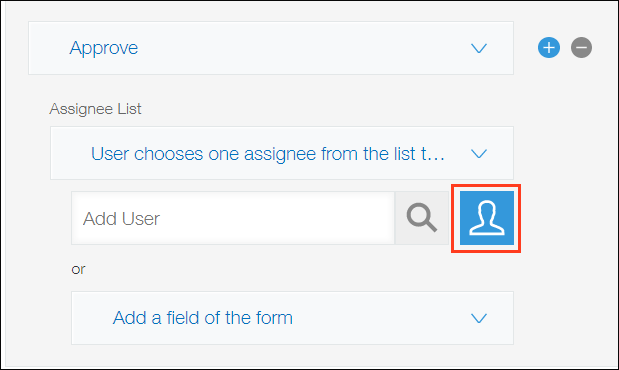
In the status where you want to add the reporting manager as an assignee, click the Select users from departments or groups icon under the Assignee list section.
-
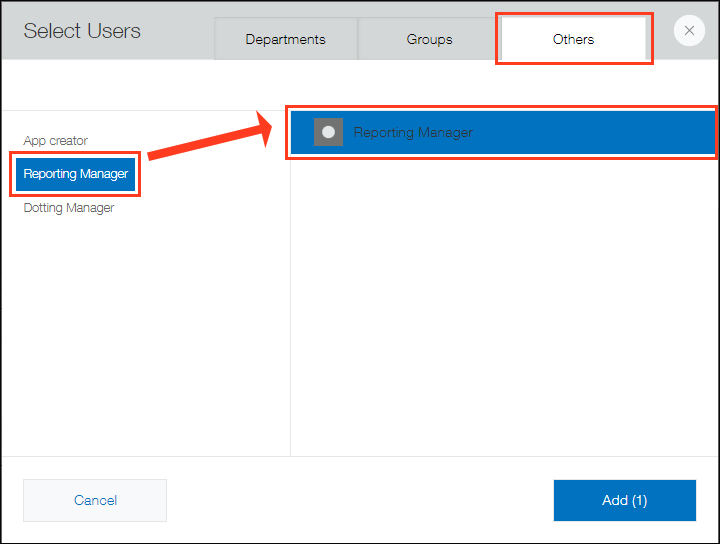
In the Select users dialog, click Others, and then choose the reporting manager.
To make a request to multiple reporting managers, you must add multiple assignees when configuring the process management.
-
Click Add.
Example 2: Setting multiple approval routes
If there are multiple approver combinations possible depending on the department of the requester or the contents of the request, you can create an approval route in another app.
By using a lookup to get the approval route when a request is made, you can have the appropriate assignee set based on the department or request details, allowing process management to proceed smoothly.
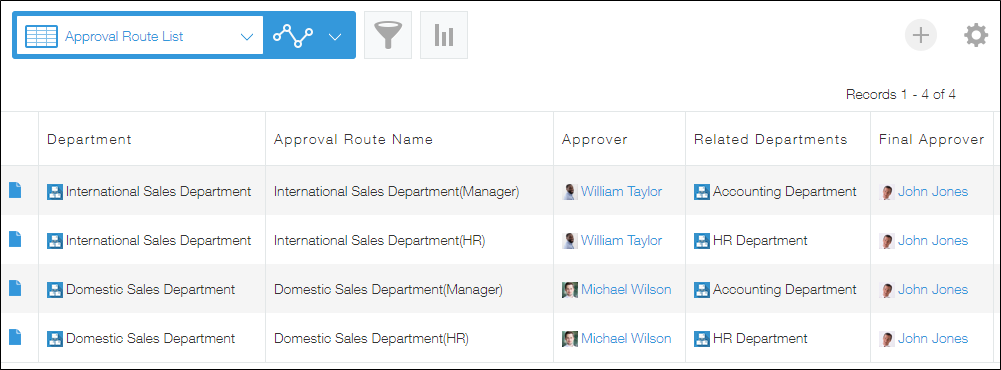
Image of the created app:
To set multiple approval routes, follow the steps below.
Create an approval route app
-
Create an app to add an approval route.
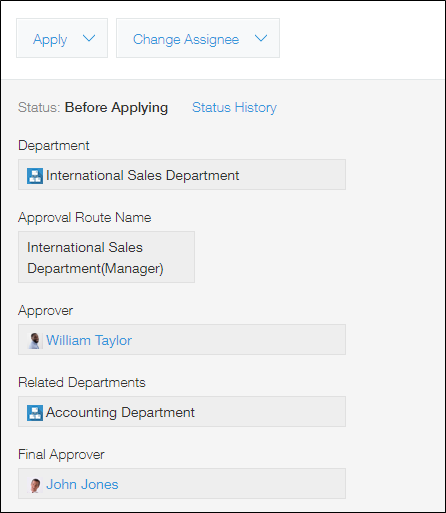
Add the following fields to the form of the app:- Approval route name: Text field
- Department: Department selection field
- Approver: User selection field
- Related departments: Department selection field
- Final approver: User selection field
-
Create a new record in the approval route app.
Retrieve the approval route
-
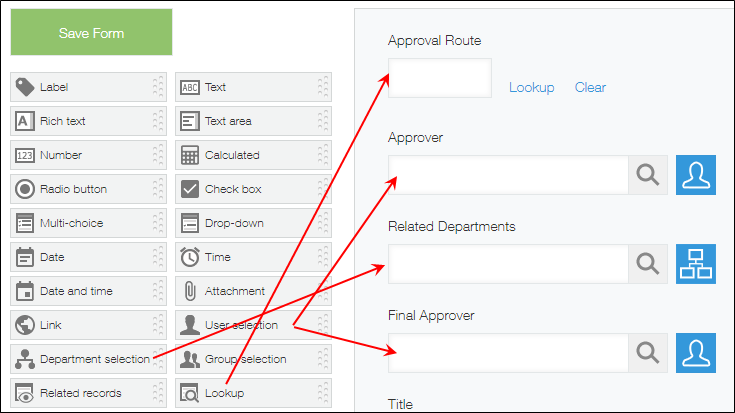
Open the kintone app where you want to add a reporting manager as an assignee.
-
Place the following fields on the form.
- Approval route name: Lookup field
- Approver: User selection field
- Related departments: Department selection field
- Final approver: User selection field
-
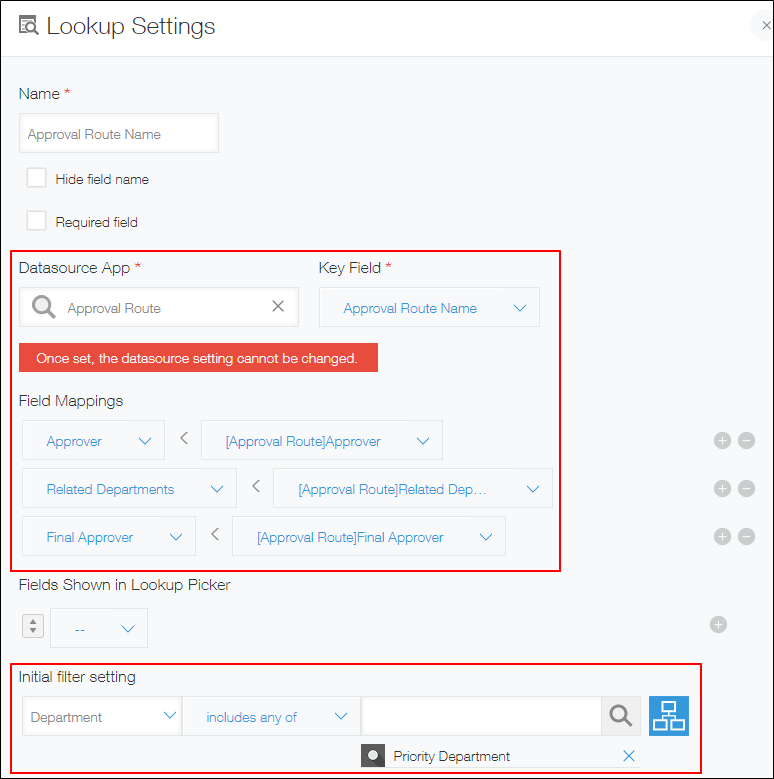
In the settings dialog for the "Approval route name" field, configure the fields to retrieve the approval route name and assignees (Approver, Related departments, and Final approver).
By including "Priority department" for "Related departments" in the initial filter setting, you can get the approval route for your department immediately.
 For information on Lookup fields, refer to the following page.
"Lookup" fields -
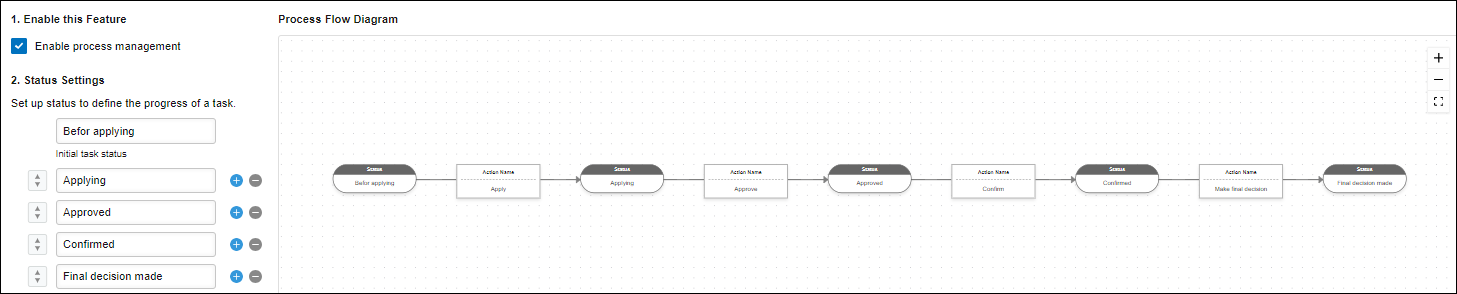
Set the statuses on the Process management screen.
The statuses should be as follows.- First status: Before applying
- Next statuses:
- Applying
- Approved
- Confirmed
- Approval finalized
-
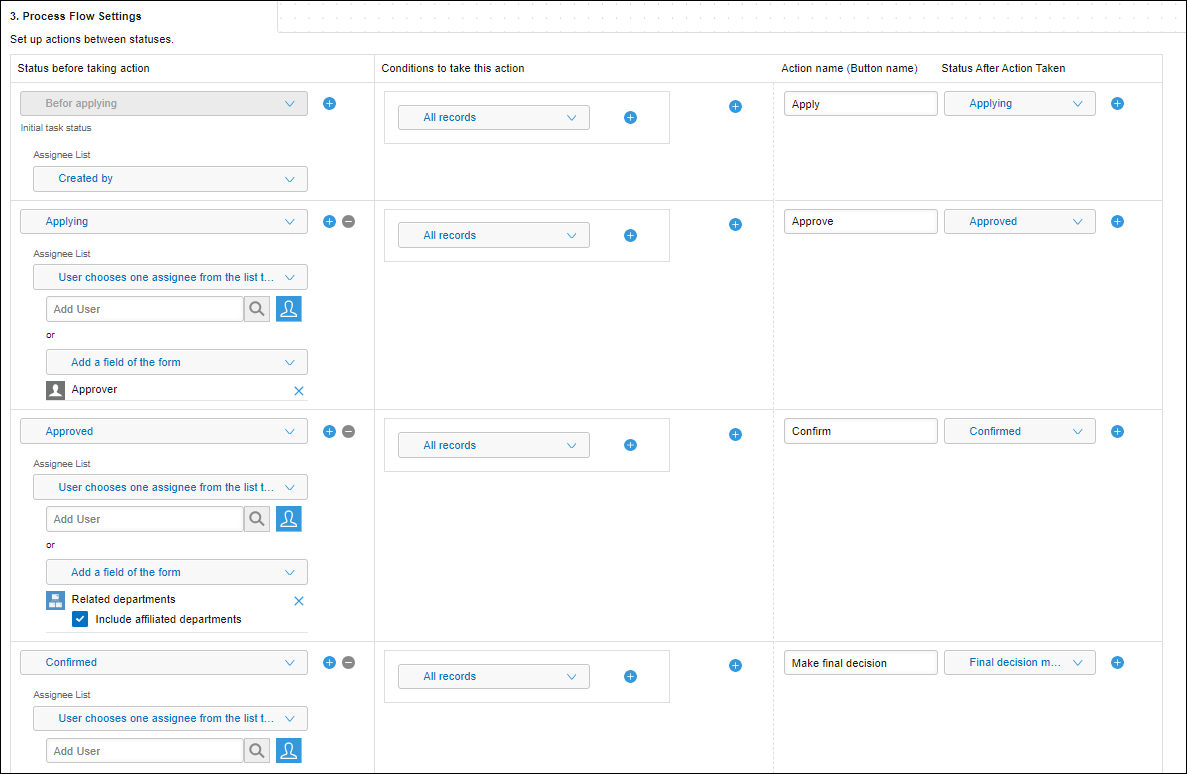
Set up the first process in the workflow.
The process settings should be as follows.- Assignee: User in "Created by" field
- Action: Apply
- Status after action taken: Applying
-
Set up the next processes in the workflow.
- Process for "Applying" status
- Assignee: Approver
- Action: Approve
- Status after action taken: Approved
- Process for "Approved" status
- Assignee: Related departments
- Action: Confirm
- Status after action taken: Confirmed
- Process for "Confirmed" status
- Assignee: Final approver
- Action: Finalize approval
- Status after action taken: Approval finalized
- Process for "Applying" status
-
Make sure the flow diagram looks correct, then update the app. Your process management settings should look like the images below.