Generating API tokens
API tokens are strings used for authenticating kintone REST API requests sent from external programs.
Specifying an API token in the "X-Cybozu-API-Token" header of your REST API request authenticates the request, and the API is executed. If you want to specify multiple API tokens, separate them using commas.
| GET /k/v1/record.json?app=7&id=100 HTTP/1.1 Host: example.cybozu.com:443 X-Cybozu-API-Token:cJrAD9Es62qm0Z3eE6uzQQmaDxM3q9jiDay1oysX |
| curl -X POST -H "X-Cybozu-API-Token: cJrAD9Es62qm0Z3eE6uzQQmaDxM3q9jiDay1oysX, 6oDAV8hCY6HTa1AC6EZbNe2dpc1t8QnWZrHOMgMb" "https://subdomain-name.cybozu.com/k/v1/record.json" -H "Content-Type: application/json" -d '{app: 20, record: {"Customer Name": {value: "kintone Research"}}}' |
For details on authentication using API tokens, refer to the User authentication section in the following page.
kintone REST API common specifications
Generating API tokens
-
Click the App settings icon (the gear-shaped icon) at the upper right of the View screen.

-
Select the App settings tab in App settings, then click API token under Customization and integration.
-
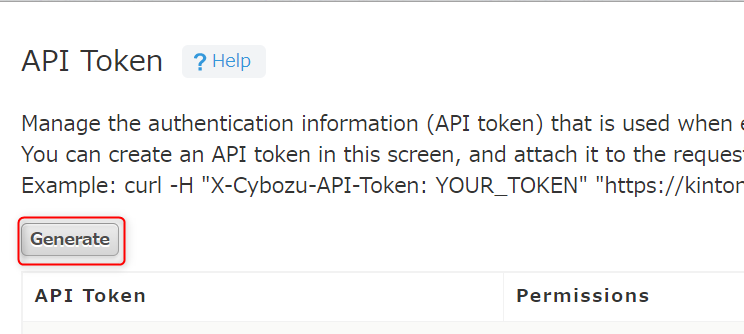
On the API token screen, click Generate.
-
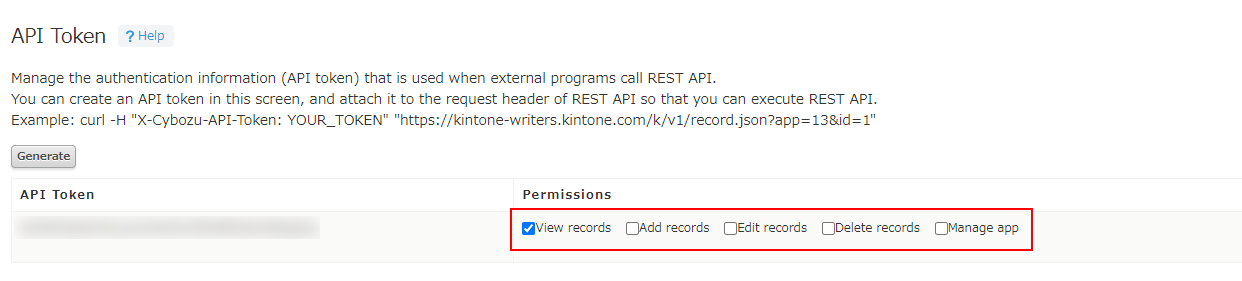
For the generated API token, select the checkboxes under Permissions for the actions you want to allow.
-
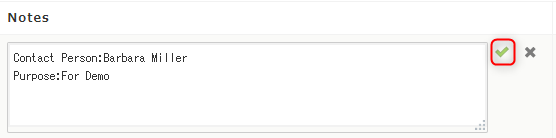
If necessary, add notes for the API token by clicking the Edit icon for the Notes input field.
You can use this field to enter information useful for managing the API token, such as the purpose of the API token or a contact person.

- You can enlarge the input field horizontally and/or vertically by dragging its lower right corner with your mouse.
- You can enter up to 200 characters.
-
Click the Save icon (the check mark) to save your notes.
-
Click Save at the bottom right of the screen.
-
Click Update app at the upper right of the screen.
-
On the Update app dialog, click Update app.