I would like to use a Date field as the record title
You cannot specify a Date field as the Record title.
Fields that can be specified as the title field
However, you can use a Calculated or Text field, which can be specified as the Record title, to display the content of a Date field as the Record title.
To do so, you need to set a formula to display the content of a Date field in a Calculated or Text field, and then specify the field as the Record title.
The detailed steps are as follows.
Steps to use a "Calculated" field
-
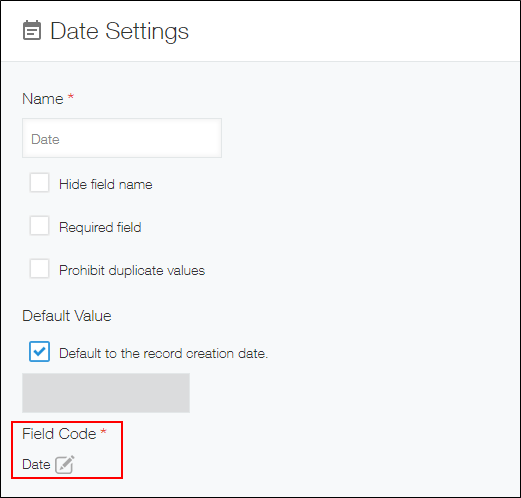
Check the field code of the Date field you want to display as the Record title.
-
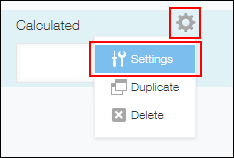
Place a Calculated field, then click Settings from the gear-shaped Settings icon at the top right of the field.
-
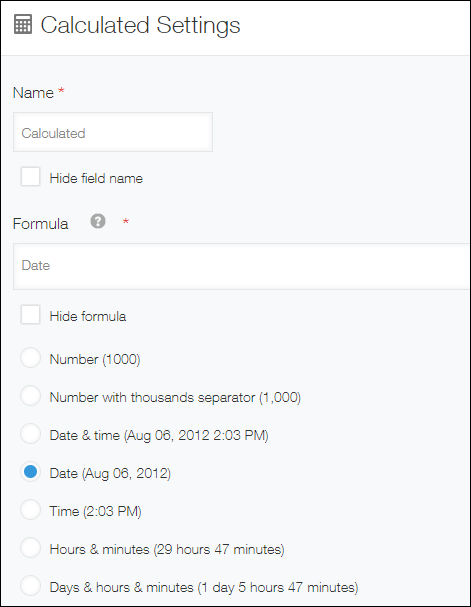
Enter the field code of the Date field, which you have checked in Step 1, in the Formula input field.
Select Date (Aug 06, 2012) as the display format.
-
Click Save.
-
Click Save form on the upper left side of the screen.
-
Specify the Calculated field as the title field.
Setting title field
Update the app to complete the setting process.
Steps to use a "Text" field
To display the content of a Date field in a Text field, you need to use the "DATE_FORMAT" function.
-
Check the field code of the Date field you want to display as the Record title.
-
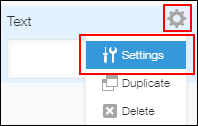
Place a Text field, then click Settings from the gear-shaped Settings icon at the top right of the field.
-
Select Calculate automatically and enter the formula.
For example, if the field code you have checked in Step 1 is "Date", the formula is as follows:DATE_FORMAT(Date,"YYYY-MM-dd","Etc/GMT")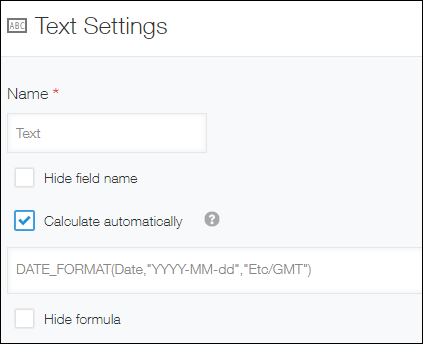
-
Click Save.
-
Click Save form on the upper left side of the screen.
-
Specify the Text field as the Title field.
Setting title field
Update the app to complete the setting process.